Day 3 / 38 – Moho
Dayyyyy 3 in Moho. First stop, the timeline, move little Gruille, move.
Things to Know:
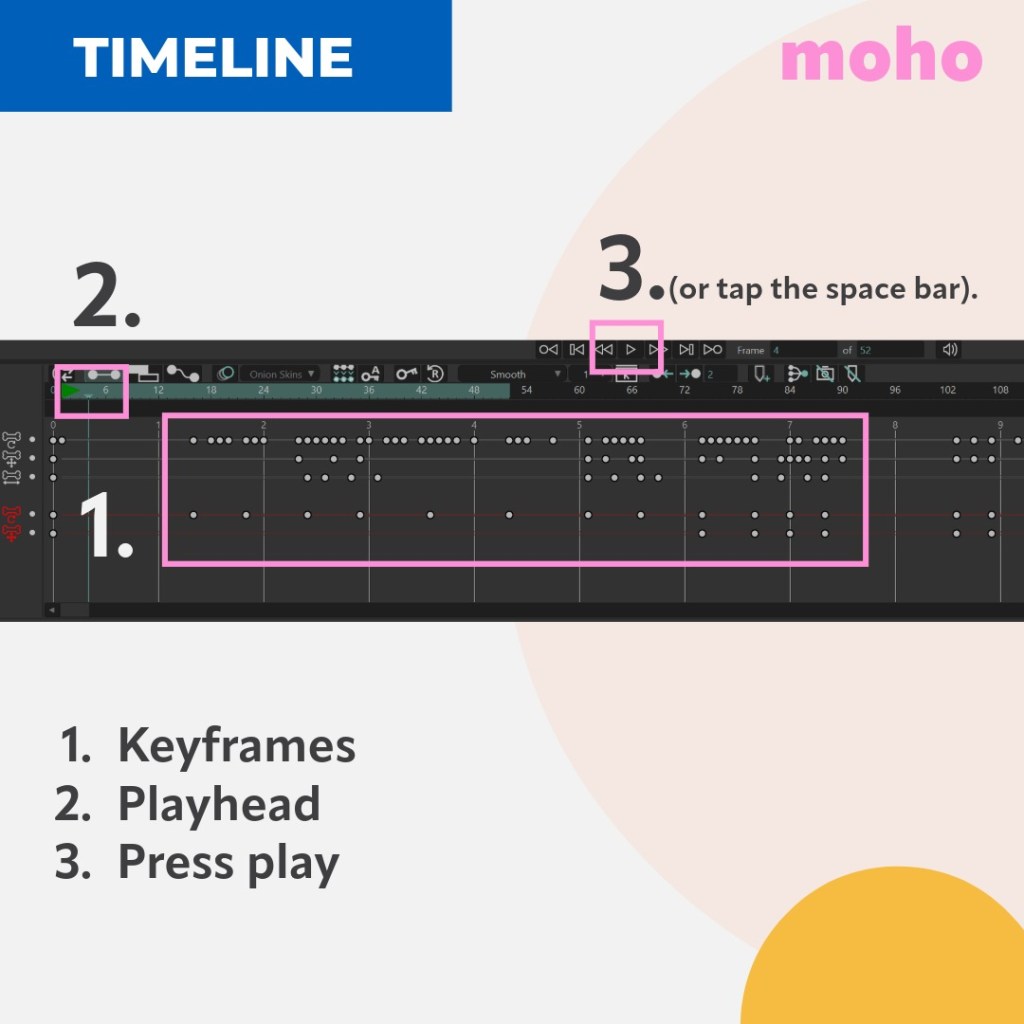
✔ Timeline location: Where your animation lives.
✔ Keyframes: Little dots on the timeline. They mark starts, stops, or changes.
✔ The playhead: The marker that shows where you are in time.
✔ Play button: Press play (or the spacebar). Watch your animation move.
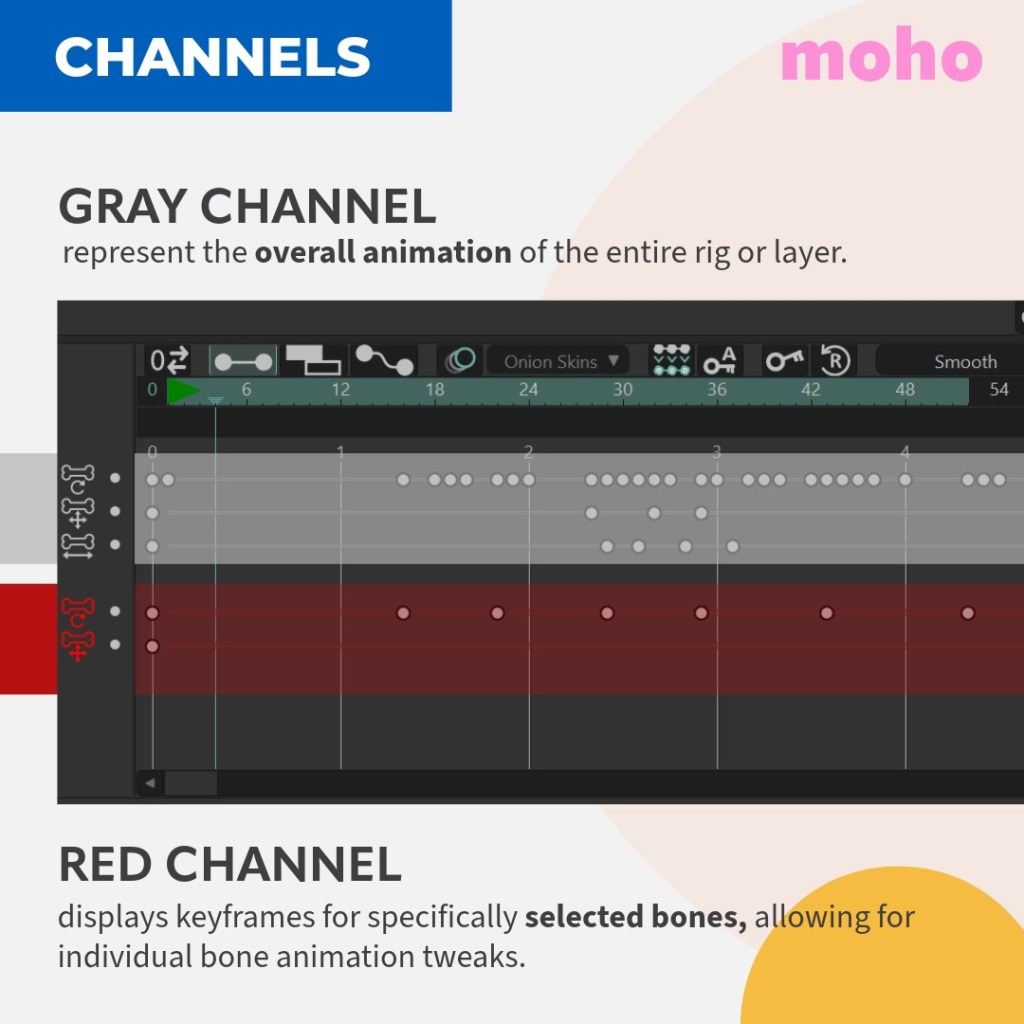
✔ Channels: Two kinds: Gray and Red.
“If you’re trying to follow this tutorial and your timeline doesn’t look anything like the example in the video (probably one simple timeline instead of the more complex in the video) then you need to check if the ‘consolidate layer channel’ is selected.”
The Tale of Two Channels:
The Gray channel and the Red channel. The Gray channels shows you the action across the entire rig, while the red channel allows you to control different bones.
Move an arm.
Moho records two things:
• a keyframe in the gray channel
• a keyframe in the red channel
Why two?
Gray channel
Shows the movement for the entire rig.
Red channel
Shows the movement for the specific bone.
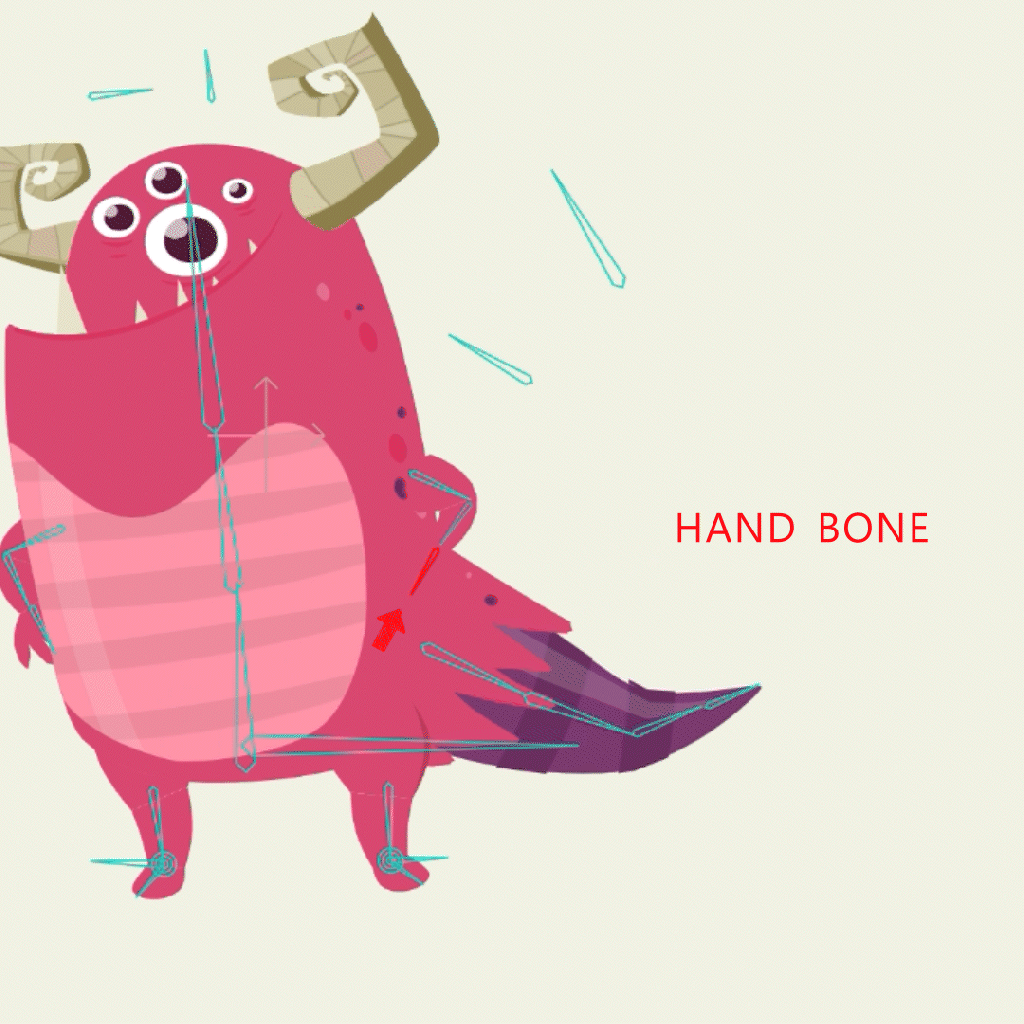
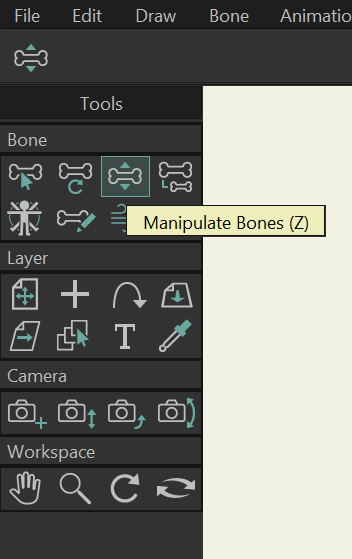
Select a bone → it turns red.
To move it, make sure you are on the Manipulate Bones tool.
Now the red channel will show only that bone’s animation.
Gray- Whole rig.
Red- One bone.
And. Wow. There’s nothing quite like making something move.
You can watch tutorials.
You can read guides.
But the moment a character moves because you moved it—that’s it. For more detailed timeline information on Moho’s timeline click HERE.
Until next time 😉